We have the following gals participating today:
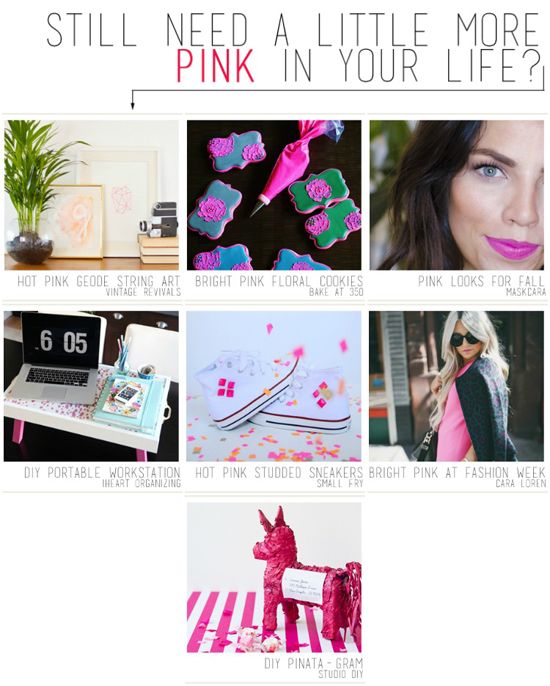
As I mentioned, the only rule is to create and share something that has to do with the selected color of Hot Pink.
Dudes.
I LOVE me some pink. Especially since I am constantly surrounded by boys. Everything is dirt, trucks, nerf guns, video games, blues and grays.... The hubby is sympathetic to my feminine side and turns his head to the occasional pink flowers, accent pillow or spray painted elephant that makes its way into a room. So I figured coming up with something for this challenge would be no different.
So I started thinking. And thinking. And thinking some more. Nothing. I had nothing. What in the world did I still need to organize around our home, which could be hot pink?! My studio is taken over by storage room materials right now, so anything in there was out of the question. I was stumped. And not because I don't have spaces that need to be organized, I just don't have gender neutral spaces that need to be organized with something hot pink. The hubby suggested that maybe I organize all of my hot pink household accessories. Ha ha ha. Um, no.
Although I have never actually posted about it, I have shared here and there that I use a small tray as a bit of a "portable desk". It is basically a cheapo melamine tray, which I pile high with my daily blogging tools. I am guessing that if you are a blogger, or even work from home, you may understand the need or desire to work from multiple areas around the house. For me, I can only stand my studio for so long until I need to find another place to work which contains natural sunlight. I may work at the kitchen table while the boys work on their homework, at the counter while the hubby is whipping up dinner, outside in the backyard to get my Dr. recommended dose of Vitamin D, or I may even head to the couch and tune into a romantic comedy. Even when I am sick and don't want to get up in the morning, my bed will turn into my office for the day. That is a lot of traveling around the abode, and I have found that it works best to use a tray to hold my favorite bloggy items for easy transporting from spot to spot. I especially love that it keeps everything together, and when not in use it can just get stashed on the buffet in our dining room or on the counter in my studio.
The tray has been working for me for quite awhile now, however, there has always been something lacking. Actually, a few things. It wasn't large enough to work off of. That meant that although things like my planner, pens, notepad, etc... could stay on the tray, I would remove my laptop to another work surface. Also, the lip of the tray didn't allow for me to use it as a workspace either. So although I could transport my items from space to space, I would still need to set up a place to type.
That is when the idea was born to DIY a sweet little tray with built in legs. Sort of like a breakfast tray, but big enough to work off of. The legs could either flip out to turn the tray into a workspace {while on the couch or in bed}, and then they could tuck back in when just acting as a means to transport and store my daily necessities. #brilliant
Oh, and we decided to DIY this little project on Football Sunday. Do any of you know what that means? That means we are not allowed to leave the house. No hardware store near us is open on Sunday, and there is no way we will drive farther than ten minutes during any given game, so the hubby would have to use items that we already had on hand, to create the tray. I would have to use items we already had on hand, to trick it out. That is a lot of challenges in one single project, lucky we love a good DIY and love to organize. We had all the supplies we needed to create something totally awesome.
Ready to see?
First, we started out with some of our leftover cedar boards from this DIY outdoor table project.

The hubby had me sit on the couch, and he measured approximately how big we could make the work surface {top}. Once we had our size determined, he used his Kreg jig to create a rectangle frame.

We had some pieces of white trim and backing board leftover from Preston's wall panel project, the trim pieces made the outer frame of the new tray. Bryan just clamped them to the base and used his brad nailer to affix them.

He used his skill saw to cut down the white board, which ultimately was affixed to the frame with some Power Grab construction adhesive.

That completed the top portion of the tray, it was time to address the legs.
Bryan grabbed the same boards that he used to create the frame, and cut four down to the same size {10"}. He then gave them each two 45 degree angles on one end. The angles would allow the legs to rotate along the underside of the tray top.
To affix the legs, it was as simple as drilling a hole through the top of the board {the end with the angles}.

The drill bit he used, was slightly bigger than the super long screw that he placed through it {right into the edge of the underside of the tray}.

He repeated the same steps for all four legs.
After filling all of the cracks and holes with caulk and sanding the entire thing down, the construction portion of the tray was finished. Next it was my turn to pretty things up. So, I snagged some white chalk paint, and gave the entire top half a couple of coats. The legs received the hot pink treatment.
But that wasn't pink enough. I also had some incredible fabric, and I thought it would make a super fun hot pink top to the tray.

As shown above, I used clear contact paper to cover the top of the fabric, which gave it a durable, cleanable finish. Then, I cut the contact paper/fabric combo, down to size, and affixed it to the tray top with some double sided tape.
After digging through my hardware bin, I snagged a few drawer pulls, gave them a quick coat of gold spray paint and screwed them into each side of the tray.

Tada!

I am over the moon happy with how this little project turned out. This tray does not only work as my workstation, but also as a serving tray, a bar tray, an accessory on our coffee table and for my family to serve me breakfast in bed. OK, that last one doesn't happen, but if it did, this tray would rock it.

You know I really love a project when I take 7,283 photos of it. Here it is in typical fashion, holding my laptop, daily planner, writing utensils, a notepad, my phone and some office accessories.


I am a bit of a stationery snob. Isn't that notepad beyond adorable? Found it at the sweetest little boutique on vacation with the boys a few weeks back.

The handles work so great for toting all of these supplies from desk to couch to table. And when I find myself on the couch with the hubs at the end of a long day, those hot pink legs make a super sexy appearance.

What we have been high fiving about around here, is that we were able to DIY this entire thing with items we already had. Wood, paint, hardware, fabric and clear contact paper. Super simple. Super sturdy. Super awesome.

Anyone else been having fun decorating, baking, DIY'ing or organizing with hot pink? How about using project scraps to create something you will love for the long haul?


No comments:
Post a Comment