Last week I shared that I have some storage spaces that I need to take care of; the utility room, under the stairs and the garage. All not so fun in my book, but thorns in my side and spaces that cause unnecessary stresses. I have addressed all of these spaces in the past, but I haven't done it correctly, and they end up falling back into stash-and-dash rooms.
So what makes this time different? I am putting all other home projects on hold until we get these right. Until we truly address why these areas are failing and put in proper systems to fix them.
The first thing I realized is that none of the spaces we are using are given direction or clearly defined. Meaning, they are duplicating efforts, and when something goes missing, I am not just checking one storage room, I am checking three. Step one for us was to sit down and assess the items that are in each of the areas currently, and determine where they should ultimately end up at the end of our big overhaul. Our list looked a little like this:

By defining what we want in each area, it allows us to sort correctly right off the bat. It also allows us to determine what we need storage wise.
One look at the utility room, and I can come up with a huge list of reasons why it has been failing us for the past two years. Realize that by me showing you this, I must now go crawl in a deep dark hole that I never come back out of.....

Clearly that huge door in front of shelves has been causing us a lot of problems. How in the world can we put anything back on the shelves behind the door, with that in the way? And that door? It is an extra from renovating our basement. Not even something we need. So yes, something we don't even need, has been sitting in our storage room for over a year blocking all of our shelving. Smart right?
Let's take a closer look at this awful mess and try and pick it apart. We could do a picture find, my kids love those!

Nonsense I tell ya! Goodwill finds, paint cans, bins with unknown contents. And an entire room that is probably dangerous in more ways than one. Oh, and imagine the climbing fun that occurs when we blow a fuse. Our electrical panel is back there somewhere.
Behind the door is just as bad, maybe even worse. Are you ready for this?

Baskets, lamp shades, storage bins, pillows and more pillows. Thrift store finds and a random paint tray? I have no words.
We knew this project was coming for a few weeks before we announced it. I could feel it in my gut. So I started finding ways to make myself excited to work on it. I was dreaming up finished walls, an awesomepants work bench with oodles of tool storage and pretty labeled bins all in a row. Yes, we could make the space amazing!
But these ideas were happening with a skewed vision of what the room could accommodate and forgetting how much was in there, and how bad it really was. Remember, I typically avoid this space, so I hadn't really taken into consideration what all was happening behind the closed door.
So, all excited, I did a little jig downstairs and swung open the door with the cheesiest of grins spreading cheek to cheek.
And then I paused.
I stood there.
I gasped.
My heart started racing.
I got faint.
I got overwhelmed.
I got upset, and even felt a tear start to form.
I had to get out. So I ran back upstairs, sunk on the couch and turned on some Netflix.
True story my friends. That happened. I got SO discouraged looking at that space, that I had to find a way to tackle my crap head on. I do that by catching up on my favorite TV series and pretending to ignore it for awhile. And while I watch that meaningless television, I am really thinking. Thinking long and hard about what I just saw, and what I am going to do about it. How am I going to get that excited feeling back that I had before walking through the door? What can I do to make that room blissful, so I never have to go through those emotions again?
For me, it is a few things:
- Knowing that it can only get better {the only thing that could make the room look worse would be a sewer back-up}.
- Being OK with the fact that working on the project was going to have downstream impacts on the rest of our home until it is done.
- Chatting with my hubby about potential options and creating a plan. This girl loves to plan.
- Clearing out the space to see what we really have to work with.
- Grabbing a bucket of paint.
The second bullet is a big one. And even though I psyched myself up and told myself that once we emptied the utility room, that stuff would have to go somewhere and I would have to give up my family room and studio for a few days, once it finally happened, that overwhelming feeling came back a second time.
That is right, we blank slated the utility room. We removed every last item, jotting down each item we were taking out and sorting it immediately into a keep, trash or donate pile. That was a VERY important step in the process. I didn't want to have to touch things more than necessary. Once the utility room was empty and clean, my studio and family room was another story:

Told you this process was going to be messy! I told myself too. In fact, it still looks like that this very moment that I am typing this. I can't say I didn't have moments in which I couldn't breath. I can't say that I didn't find one of my extra pillow forms and scream curse words into it. I can't say that I was singing happy tunes and feeling like an organizing fairy princess. This process has brought out quite a few emotions.
But grab a paint bucket I did, and the smile eventually came back.
So what did I paint?
The concrete floors. I have a dry phobia {think ceramic pots, chalk dust and peaches}, and the utility room had one of those dry, dusty concrete floors. I thought that maybe giving them a fresh coat of paint, would take away that sterile gray look, and slick them up a bit for easier cleaning.

I edged out the entire room with Porch and Floor Enamel, I selected a pretty tealy blue called Great Falls by Sherwin Williams.

Once I was done edging, I used a smooth roller on the remaining areas.

The paint covered really well after the first coat, after letting it cure and dry, I did a second coat of touch-ups.
We knew we wanted to bring majority of our tools into this space. We have a workbench in the garage, but I couldn't even tell you the last time we used it. We do majority of our projects inside, with the exception of using the table saw. So for us, it doesn't make sense to store all of our tools outside. Doing so, only causes us to stash some in the utility room and others in random piles around the garage. So I started scouring Goodwill and checking Craigslist for an old, cheap dresser that would fit in our small space. I came up with nothing. If you have an icky old dresser, I suggest you sell it now while the time is right. Are people seriously getting $60 for chipped, 18 year old dressers? According to Craig and his list, the answer is yes. Craaaazy!
So what do you do when you can't find a dresser at thrift stores? You start calling your family. And our family delivered! We got this beauty for F R E E!
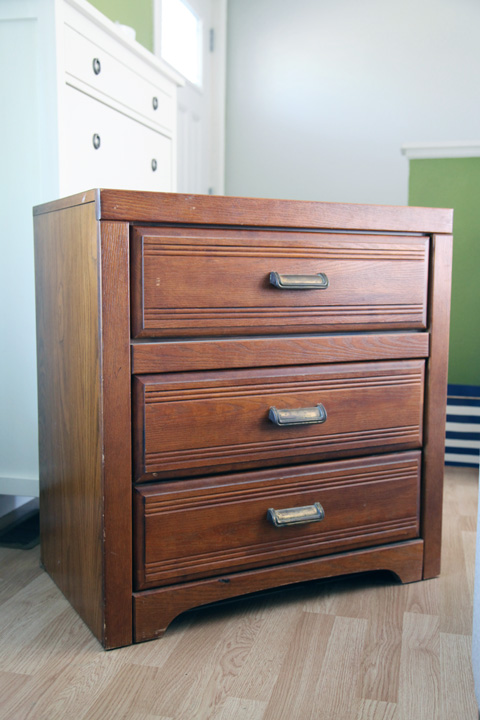
And it got painted. And you bet I used one of the bajillion colors I already had on hand.
.jpg)
The pulls were given a coat of Liquid Gold Leaf.

Last but not least, I found an old stool in the boy's bedroom, which they were no longer using to hang their clothes {because now they can reach - sad mama face}. That got a fresh coat of happy yellow spray paint.
The last step we have taken thus far, is adding in boatloads of extra shelving. The key component to this process was ensuring we are using every possible inch of space. It is also important that our items are simple to access and can slide out, vs. being stacked and hard to get at. Stacking items essentially creates an extra step when going to retrieve and put things back, so I wanted to avoid that as much as possible.
We ended up selecting two sets of shelving from IKEA; the IVAR and the GORM. We didn't take this process lightly. We thought about utilizing the plastic shelving we already had, however, we were losing a lot of space by doing so. And the shelves really weren't all that sturdy. We could build something custom, but we figured when time and cost was considered, the IVAR would get us ahead of the game. By piecing it together, we could get deep {20"}, adjustable {a.k.a. versatile} shelves, that covered every square between the water heater and furnace. Even the corner, which was huge for us and gaining oodles of extra storage. The GORM was less expensive and more narrow, so we were going to line the wall behind the door with those.
Hours of shelving assembly and paint drying later, we are now left with this wonderfully blank slate of a utility room!

{That white thing is a discounted lighting fixture we snagged, coated with white spray paint and waiting to be installed}.
Oh how I wish the beautiful floors showed as well in photos as they are in person. They were such a game changer for the space!

And look at all of that storage we now have! Say hello to my new paint holders!
Everything is currently empty, including the newly painted dresser. I can't wait to fill it up with our tools and DIY supplies!

We added some extra pegboard we had from a few extra projects, behind the dresser to keep our commonly used tools more accessible {and easier to put back}.

And yes, gold hardware in a utility room.... I think it adds a splendid touch.
Here is another view so you can get an idea of the size of the room, and how we were able to find shelving that magically fit our needs.

And let's take a minute to appreciate the pop of yellow in the deep dark dungeon of a space. It is the little things my friends. And no more excuses for not putting things back on the upper shelves.

So although I wasn't able to get finished walls and an off-the-hook workbench, I think we found a happy compromise for now!


Of course, the true before and after photos will be when we load all of our junk belongings back inside. Speaking of which, I am off to sort through it all now. It may be days before I come up for air... and if you don't hear from me for awhile, send in a search and rescue team. But these changes we have already made, really did get my heart racing in a happy way, to keep on fighting the good fight!
Until then....


No comments:
Post a Comment