Although you may think I am also the queen of exaggeration, this project started back in September of 2012! I guess that is why it feels so fabulous to finally call it done. The funny thing is that it was a really simple update and was another one of those, "why did this take us so long?" moments. You may have caught a glimpse of our new-ish studio chair back when I shared an update here.

Back in that 2012 month of September, I shared a little recap of some of my favorite local finds and my desire to diversify my shopping habits. After that post, I realized that I should have jumped on one of the chairs I spotted at our local Habitat for Humanity ReStore.

Sexy right? Check out the backside.

I am pretty sure they once lived in a nursing home dining room, but those curves. So fabulous! And I have been head over heals obsessed with chairs that offer an open back. I really had to have one.
So, I went back and purchased one of the chairs with intentions of using it in my studio at one of our two workspaces, as they just were not going to work for our dining room situation. Total cost - $15.
We tackled this chair project in three simple phases; phase one was painting the frame.
Painting the chair frame was a super simple paint job. I just removed all of the cushions and used three thin coats of Annie Sloan's chalk paint in Pure White.

Fast forward a few months and phase two was about to begin! I couldn't wait to get those maroon vinyl cushions reupholstered!
This part of the process started out with hours and hours of needle nose staple pulling to remove the original vinyl upholstery. Not at all enjoyable, but so worth it in the end.

For the piece that shows through on the backside of the chair, we used the original insert as a template and sprayed it with adhesive glue. This was to ensure that the patterned fabric would lay nice and super flat and allow me to press out any wrinkles.


Once the fabric was attached to the chair insert, I switched to a set of fabric sheers and cut around the template. Then we popped it back into the painted chair frame and attached it with a staple gun.

I had wanted a pretty floral pattern for my studio, and I ultimately had landed on P Kaufmann Arabella Pink. It doesn't seem that this particular pattern is available any longer as I purchased it over a year ago now. But I really do love it!

For the seat side, I found a super soft suede from a local fabric store in a tealy blue color. The seat was a pretty straight forward upholstery process. I always push down on the seat while my hubby pulls the fabric tight and staples.

Because the back cushion didn't have anything for the fabric to wrap around and staple in, we had to staple the fabric directly to the frame of the chair. We used the staple gun to follow the edges of the foam cushion and did the best we could to pull the fabric tight.

Then we very carefully cut away the excess fabric as close to the staples as possible.

The edge was looking a little rough at this point, and I would either need to add double welting or some decorative nailheads.

After seeing this amazing chair, I knew nailheads was the way to go.
Fast forward to this past weekend and we finally busted out the hammer and needle nose pliers. Another very time consuming part of the process that the hubby and I took turns tapping away at, literally. It was fairly simple as we just used the pliers to hold the nailhead and gently tapped it in place with the hammer. {I found the nailheads at JoAnn}. It just required some patience to keep everything lined up as we added one nailhead at a time following the natural lines of the cushion.

So a project that probably could have been completed in a single weekend, is finally done over a year later.

Isn't she beeeeautiful!?

It has definitely come a long way from it's nursing home dining room days...


The solid colored front and nailhead detail adds a bit of sophistication...

While the back is unexpected whimsy!

Although the studio still has A LOT of work to be done, I have really been enjoying working at this space, while the fam has taken over the desk on the opposite side of the room. Some days my desk faces out towards our family room {so I can watch a movie while working on emails}, and other days I face it towards my memo board. I love the versatility.
Speaking of memo board, I made it years ago from a frame found at the Salvation Army paired with some cork and linen fabric. I call it my "board of happiness".

It basically is covered top to bottom with things that make me smile throughout the day. Photos of our family and friends, special cards received, inspirational quotes, fabric swatches, tokens from travels....


It does a good job at keep my spirits high, especially on days when I am feeling cooped up or stressed out.
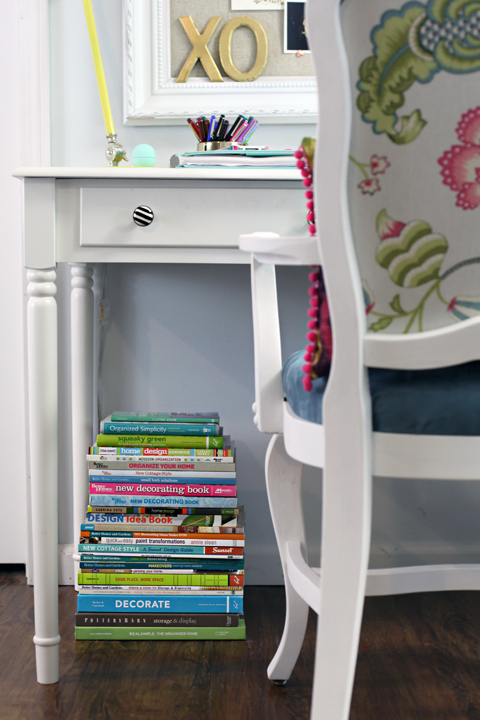
Under the desk I keep a pile of inspiration.
As I mentioned, the studio has a lot of changes ahead of it. Although my vision for this area changes quite frequently, I am just taking it one day at a time. I have been plucking away at it for a few years now, but it is where I spend so much of each day that I want to make sure I really, really heart it.

What is the longest you have had a project drag out? Did you feel overwhelming amounts of joy once it was finally finished?
.png)


No comments:
Post a Comment