Hey there, friends...it's always a thrill to hijack Jen's blog for the day, and today I'm especially excited to share my latest project with you! The temps are finally warming up, which means we'll be spending more time outside... especially at mealtime. I've seen so many cute outdoor serving pieces in the stores, but thought it'd be more fun to customize one myself. And who doesn't love a Lazy Susan... so I combined it all into one fab tray!
WHAT YOU NEED
18-inch Pine Round (found for $5 at Home Depot)
Cork Trivet
Cabinet Pulls
Jute String
Decorative Paper (I used this crab paper)
Clear Contact Paper or Mod Podge
Spray Adhesive
Paint

Okay, so I snapped the supplies picture based on how I thought the project would go, so of course that didn't happen. This project took some trial and error, and I may have gone through a few sheets of paper, and started over twice, but you lucky-ducks will get to skip all that, because I've worked out the kinks for you!
WHAT YOU DO
1. Paint the entire wood round. If your paper is dark, you may be able to skip painting the top, but it's best to go ahead and paint the whole thing so the wood doesn't show through. (Lesson learned #1)

2. Peel the backing off a piece of Contact Paper, and layer it over your decorative paper, smoothing out any bubbles... essentially laminating it to protect from messy food and drinks. Then spray the back of the decorative paper with Spray Adhesive, and lay the round face-down on it. Use a sharp blade to cut around the edges.

3. By cutting both papers at the same time, you're left with a clean edge. You could also skip the Contact paper and brush a few coats of Mod Podge on the top to protect it. Clear Glaze spray, however, will just absorb into the paper instead of creating a protective finish. (Lesson learned #2)

4. Once the top is set (and dry if you used Mod Podge), turn it over and attach the Lazy Susan Turntable with screws.

5. To protect your table surface, hot-glue a cork trivet to the base of the turntable. You could also attach a scrap piece of wood.

6. To go with the nautical look of the crab paper, I wrapped jute string around the cabinet pulls, attaching with hot glue.

7. I realized my pulls were too small, so I switched to a larger, chunkier pull, and screwed them in place. Tip: use a sharp bit to make a pilot hole first, so you don't shred the surrounding paper. (Lesson learned #3 & #4)

8. Stand back, admire your work, and pat yourself on the back. Then thank me for screwing it up 4 times so you wouldn't have to. ;)

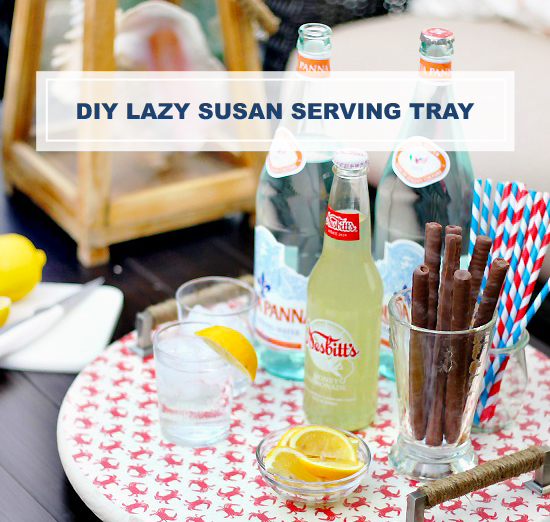
With the solid base and strong handles, this is now a sturdy tray for carrying treats outside... and the swivel action makes it fun for entertaining. I love it so much I took 1082 pictures....
 |
| See the full patio makeover here. |


You could certainly skip the handles and/or Lazy Susan, but I'm a fan of more is more, so bring it all on! Thanks for hanging with me today, and happy almost weekend, lovebugs!
Check out more of my Look for Less {DIY} Trays:
 "Hi, I'm Cassie, a DIY and design-obsessed Texas girl, and lover of travel, fashion, sarcasm and Mexican food. When I'm not hanging with my sweet and funny family, you can find me kicking the '80s out of our home, one budget project at a time, on my blog Hi Sugarplum!"


No comments:
Post a Comment