With the layout of our home, we have been a bit limited in where we can carve out a place for me to work. And after I shared our planned changes, I received quite a few suggestions for alternative options such as moving the studio to our guest room or swapping out the space with the playroom. All definitely things we have considered, and as the boys grow out of their play space down the road, we can always re-evaluate that option at that time. Until then, we really want to work with what we do have, because at the end of the day, I feel blessed to have a nook of our home to use for crafting and projecting and blogging. There are so many features that I love, such as the abundance of storage and the under-stairs organizational systems. I am a believer that rooms always evolve and grow and am OK that I have had to reassess and take steps back in order to move forward. I have learned so much from the process and have also realized it is not worth getting down on myself for not getting things right the first time, or second time or even the third time.
As a reminder, we built in a wall desk a few years ago, and I tried over and over to love it. Some days I really did smile while using the space, but a few days in a row of using it and I realized more and more that it just wasn't working. I found myself using our kitchen table because I could spread out and use my planner and make lists and manage paper piles. So, we made our own oversized desk/table in the studio to solve that problem and so far, so great! I love facing out towards our family room which either offers natural light flowing in from the playroom or a view of the television. And I just don't feel so confined. It is fabulous.

But that meant we no longer needed that small desk surface any longer. If you recall, it was actually made from an old bi-fold door we had in our storage room, so I wasn't all that distressed about removing it. But I had to put some thought into what would take its place. Having so many hard work surfaces felt redundant and unnecessary and brought in a lot of hard lines into the space. This nook needed softness and textiles, thus the idea to build in a bench was born.
Only this time, live and learn right? We weren't going to actually build it in, just give the illusion without having to live with a permanent decision. So consider this a floating built-in bench tutorial.
The construction of the bench was primarily out of simple 2x4's and a piece of 1/2" plywood, which allowed us to keep the cost of the project quite low. The foam was the most expensive part, but if you watch JoAnn for sales it occasionally runs for 50% off, which is when we pounced. The batting was also 50% off and I was able to use a 40% off coupon on the fabric. The total cost of the project really depends on the amount of foam and fabric needed, as well as the type of fabric selected.
To get started, we created the base of the bench from the 2x4's.

It was a super simple construction and essentially looked like this when we were done. 42 1/2" wide by 18" deep.

Not very pretty, but super sturdy!

Bryan also added two small strips of scrap wood to the back legs to attach the back of the bench down the line. The seat was made from plywood, foam and batting.


The rest of the plywood was used for the back of the bench. I wanted to add a small curved detail, so we traced a lid from a round storage bin.

And then cut with our jigsaw.

We used 3" foam on the bench seat, and 1" thick foam on the back piece. To attach the foam to the plywood back, we used a few strips of carpet tape and it worked like a charm to hold it in place until we could get everything stapled in.

I didn't want any wood showing when the project was said and done, so we also wrapped the base of the bench with batting.

The upholstery process was pretty straight forward, the only tricky part was managing those curves at the top of the backing.

Here we did a size check, and you can see where I was heading with the project. Sort of a bench meets headboard affair.
I am planning on leaving the underside empty to allow us the option to add roll-in storage down the line, but definitely wanted to hide those bare wood legs with a skirt. To keep the project as simple as possible, we grabbed a roll of hem tape for the bottom of the skirt. Easy peasy.

We then stapled the unfinished top edge of the skirt to more pieces of scrap wood, which was then screwed into the base.

The final touch was to add some nailhead detail to the top edge of the backboard. We have done nailhead before, and took the long route. This time, we went with a simple roll of trim which was much, much easier!

Then the back was attached with a few more wood screws.... and done!

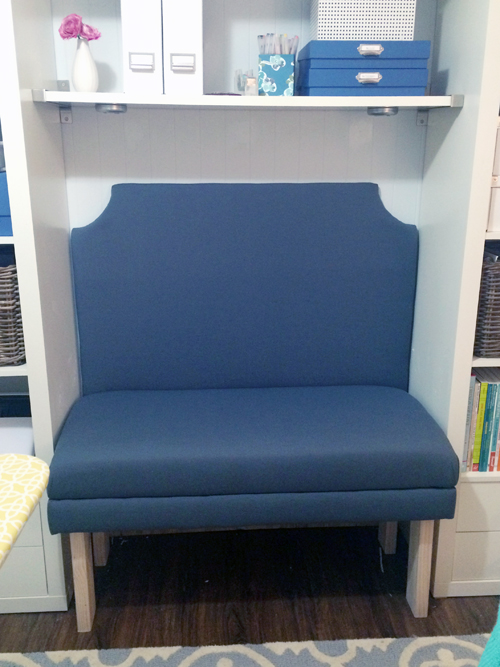
Remember that gray wall that I loved but didn't work because it made the room feel super choppy? I missed the deep gray, so I used it on the bench. It seems to work much better in a smaller dose, and I really love that I can update the look with happy colored pillows.

The second the boys saw the bench, they were excited to cozy up and lay where mama works. Which I totally love and welcome. And that softness I was after in the space? It was definitely achieved.


It is not a space for napping (unless you are a little boy with a name that starts with P), but a place to take a mental break. I love that I can pull up a pouf or kick my feat up with a good book or magazine.

I just collected a few pillows from around the house to soften all the gray, but I really love how the colors play with the rest of the neutral space. In fact, you see that little floral throw pillow? That fabric is coming into the room next, in a really big way. Enter evil laugh here.
Now, to get that table stained! I think I have settled on the color and am ready to tackle it next week. Thank you for all of your suggestions and for helping me find a finish that I am really excited to try. I will be sure to share 1,001 more shots of the room when the table is done (since that is the final project for now), but until then... you will find me here!

.png)


No comments:
Post a Comment