To prepare for her sweet little boy, she whipped up some quick and easy clothing dividers. She is here today to share all of the details, which anyone can easily re-create and use for babies, kiddos, teenagers or even as adults.

Today is my official due date. It's crazy to think I could go into labor any minute and have my first kiddo (a boy) in my arms in the matter of hours.
In celebration of my due date, I thought I'd share a small nursery organization project with you guys-- baby closet dividers. These are super simple and inexpensive to make.
Here's what you'll need to make the closet dividers:

- Wooden O's
- Scrapbook paper
- Number stickers
- Paint
- Mod Podge
- Foam brush
- Scissors
- Pencil
Our closet clothing rods are metal with a shelf attached to the top, so I needed to cut a space in the O's with a hack saw so I could slide the dividers onto the rod. After I cut the dividers, I lightly sanded the jagged parts left by the saw.
If you have a rod that can be removed, you can just slide the O's on without needing to cut them.

Then, I spray painted the dividers.
You can use any paint you have handy-- spray paint, craft paint, latex. It doesn't matter.

I grabbed my scrapbook paper, turned it over, and traced the dividers with a pencil.

Next, I cut the paper out with my scissors.
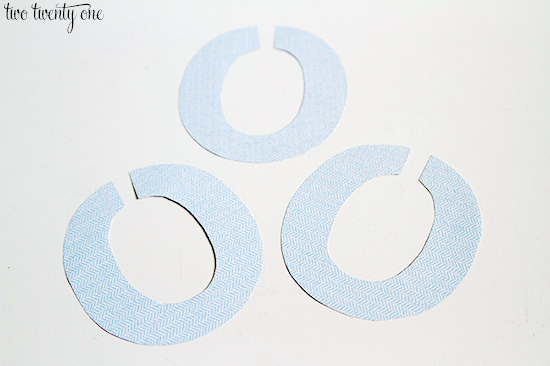
Then it was time for the Mod Podge to adhere the scrapbook paper cut-outs to the wooden dividers. Make sure you lay your paper on top of the divider first to make sure it's lining up correctly.

After the paper was dry, I stuck the number stickers on. And that's it!

I think I'll whip up some extra closet dividers and save them to give as baby shower gifts with my DIY burp cloths and applique onesies.

 "Hey friends! I'm Chelsea from Two Twenty One! I'm a twenty-something living in Indiana with my husband, Brad, and our crazy mutt, Jack. My loves are photography, travel, DIY projects, baking, wine, sarcasm and my iPhone. The husband and I are attempting to make our home a little less cookie cutter and a lot more awesome. My little slice of the internet, Two Twenty One, is where I share my latest home improvement projects, furniture makeovers, crafts, recipes and home & seasonal decor ideas. I am beyond excited to join Jen and the rest of the IHeart Organizing team!"


No comments:
Post a Comment