
I had recently come across some high-end leather cord wraps online, so when I spotted some gold gilded leather at JoAnn, I knew exactly what I wanted to do with it. With a 40% off coupon, I was able to pick up the leather for around $6.00. For this project I also ended up using some brass mini anorak snaps and liquid stitch glue {which can also be found at a craft / sewing store}. I thought I would end up doing some stitching by hand, but it wasn't necessary so you can ignore the spool of thread in the photo below.

This project can easily be done in under an hour on your own, however, I had my husband assist to speed along the photo taking process. Such a good guy!
Here is a close up of the snaps. Each snap starts out as a total of four pieces and I was going to end up with two total snaps.

The snaps I purchased came with a kit for setting the snaps. Now that I have the kit, there is nothing that I can't add snaps to, it is like a whole new door has been opened!
I started by deciding where I wanted the snaps to be located and lightly marked with a pen. Using the kit we were able to easily punch holes into the leather with a few hits of the hammer.


Then we continued to follow the directions for the snap kit and had the bottom of the first snap installed.
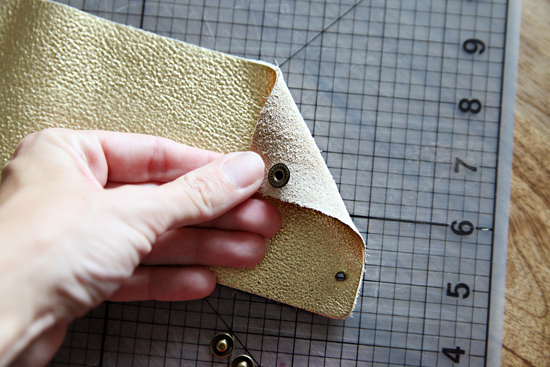

I added two snaps on one end of the gold leather strip, then folded it over to mark where the top portion of the snap needed to be installed.


To finish off the receiving end, I folded over the edge to create a crease and added the liquid stitch around the snaps.

I then pressed the end down to let the liquid stitch take hold, it will fully cure within 24 hours.

I determined approximately where I wanted to place my cords and drew a cut line with a straight edge. A new blade in our utility knife created a nice and clean cut in the leather.


I then rolled the cords and slipped them through the slit cut in the leather. Tada!


I don't know guys, I think it is pretty darn sweet! I love that it keeps the cords corralled and wrangled nice and neat within my purse or carry-on travel bag.

I also love that it is a pretty gold finish! This project was a simple and quick win!
The snaps were a little extra expense but I found they really finished off the look of the cord keeper. But to save on those costs, the same slits could be created within the leather and it could just be rolled and tied with string, ribbon or twine. Whatever is clever I say!
Anyone else playing with new supplies to whip up a quick and easy afternoon project?


No comments:
Post a Comment