Our stairs are so close to completion! And I am excited that I no longer have to hide their unfinished hideousness! Wait. I don't think my excitement came across well enough. I AM OVER THE MOON IN LOOOOOOVE WITH OUR STAIRS! I can't stress enough that the stair project is one of my favorite projects that we have done to date on our home. They are the first thing you see when you enter our house, so having them finished {minus a hand rail}, is such a relief.
As a reminder, here is where we started:

And here is where we left off, new pretty white paneling!
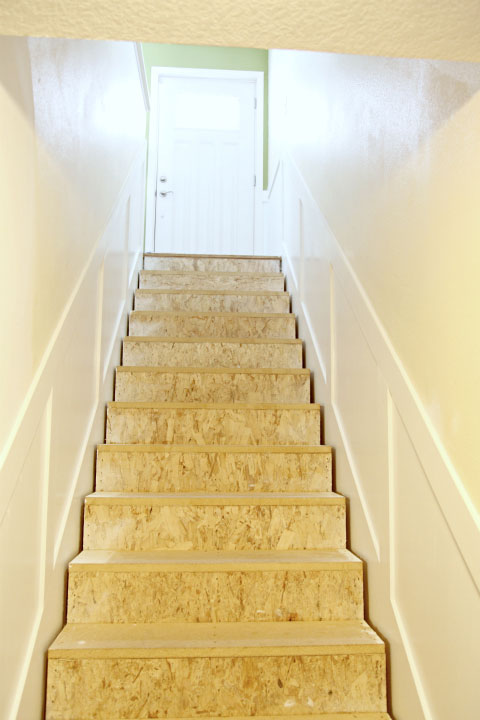
The next step in the process was to finally add some treads and risers! Eeek! My favorite part!
But it definitely didn't happen over night! So much was involved!
Since our original stairs were just construction stairs with carpet over the top, we decided that if we wanted the oooh la la pretty stairs, we would have to put in new risers and treads. Considering our DIY skill level, that meant picking up stair kits from Home Depot {vs. trying to create our own}.

They came in an unfinished oak, which meant that we would be responsible for finishing them ourselves.
While searching for the kits, we also realized that we purchased our lower level flooring from Home Depot as well, and went over to the flooring department to grab a sample for color comparison purposes.

Once we had the stain and supplies purchased...

We went to a family member's workshop to lay out all of the treads and risers on saw horses.

We put three coats of white glossy paint on the riser panels with a foam roller...

And three coats of Minwax Walnut stain on the treads, applied with foam brushes...

Once the stairs were to a shade that we liked {we had our sample floor piece placed near the stairs until we achieved the desired wood tone}, they received four coats of Minwax Polyurethane {we applied the stain and poly per the directions on the cans}.

The stairs and treads sat for a few days to cure prior to the day of installation!
Speaking of the day of installation! It was a doozy! But we did it in just one day!
The treads were too long for the width of the staircase, so they had to be cut down to size. Our walls were not perfectly even, so each stair tread cut was custom to the wall {which is why we didn't cut them down to size prior to staining and polying}.
To cut the finished treads, we started out by measuring our cut line and marking it with the green tape....

Next, we measured a second time to draw a straight cut line onto the green tape...

And also added a second piece of painters tape to protect our tread from the circular saw that would be cutting off the excess tread.

Not only did the painters tape protect the top of the tread from the saw, it also reduced splintering and cracking of the finish.

When measuring, we accounted for the fact that we would have to do some minor sanding to custom fit each board and to give the edge a nice and smooth finish.

The risers were cut down in the same fashion.
To install the treads and risers, we used a construction grade adhesive, along with a brad nailer.


And once each step was placed, my Mr. used his weight to set it.

Looking pretty sharp!

We followed this process all the way to the tippy top!

Things were looking pretty spiffy at this point! And after caulking all of the nail holes and giving the risers a final coat of white paint to clean it all up, I was ready to call it good!
But I couldn't. The upper half of the walls were just not working for me. They were painted in Behr's Navajo White about 6-7 years ago when we painted our kitchen cabinets. It was color matched to some tile and although it was a great face lift from the original dated oak cabinets back in the day, I have been feeling like it doesn't reflect our more current and colorful style. The color reads very yellow beige and I have been slowly working gray undertones throughout our home. So looking up and down the stairs at the yellowy walls didn't do all of the hard work we had just done any justice.
Knowing that within the next year, the entire kitchen and living room will hopefully be renovated and opened up into one large space, I have been searching for the perfect paint color to use to unify our entire main level.

I was going for something neutral. Something light. Something with a hint of gray but not gray. And I even reached out for help from you all via instagram....

I had a few of the suggestions mixed and painted onto the wall and found that I was still coming up short. Everything was too light, too dark, too white, too blue... and then one day I spotted it. Glidden's Smooth Stone won the gold medal!

Although it isn't the perfect mix with the existing green in the living room, it will be the perfect color for our living room/kitchen/dining combo space down the line, so onto the walls it went! And it works great with the color at the bottom of the stairs, making it feel intentional and seamless!

At the top of the stairs we added a couple of hooks behind the door {since we have no entry closet}, which are intended to be a place for our guests to keep their coats and bags while they visit.

I found them at World Market and they are simply spectacular!


Ready to see how the stairs turned out after all of the staining, polying, painting, installing, caulking, painting and even more painting?

Hello lovely stairs!

We LOVE them. Oh yeah, I said that. But we do! Such a fantastic difference from what we lived with for the last two years!

We still have to add a railing of sorts. We are still researching options and styles but I will be sure to let you know as soon as we come up with something awesome. Until then, let's just be in awe of the beautiful transformation of our secret stairs!

Totally worth the wait!
Oh, and I am so taking suggestions on keeping these babies clean. The top step is already dusty again by the time I get to the bottom! Although I am exaggerating, it is feeling like a daily task keeping them nice and purdy so if you have any quick and easy stair cleaning tips, I would love ya forever!


No comments:
Post a Comment