In no particular order, here are the individual tasks I am tackling each day this month:
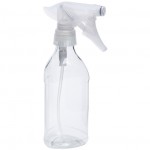
- Make cleaning supplies
- Cycle clean appliances
- Clean out cars
- Clean out microwave
- Wipe down cabinets/appliances
- Wipe down trim/doors
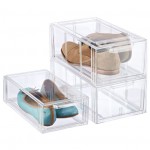
- Clean out one drawer
- Clean out fridge
- Clean out freezer
- Vacuum under furniture
- Vacuum mattresses
- Clean oven
- Clean out one closet
- Wash out garbage can/recycle bin
- Wash windows
- Scrub grout
- Clean out one cabinet
- File paper piles
- Purge bathroom toiletries
- Clean out pantry
Today I am chatting about the extra task: Clean Oven
Oh boy, today's task is a doozy! I learned a lot of lessons as I explored my oven closer than I ever have before.
Our oven is 12 years old, and I would say it looks pretty good considering I knew little about how to clean an oven or that I should even be cleaning an oven for about the first 5-6 years that I owned it {let's just say I was young and really just didn't know better}. Plus, this appliance gets used all. the. time. Especially for all of that Wisconsin winter comfort food we prepare!

After the first time I cleaned the oven and realized just how gross it had become, I got A LOT better about it. In fact, I typically try and wipe it down every couple of months and have tested a few different methods over the years {including using the oven's self cleaning cycle, which I later read is ultimately not good for your oven}. Last year, I found a natural solution that has worked really well for cutting the grime and grease that builds up on the inside. And the timing was so good for this challenge, because the inside of our stove was ready for its scrubbing.

I always start by vacuuming the inside with the hose attachment of our vacuum. Now for the magical solution... It is one I have been using throughout the entire challenge already! Pretty fantastic how one combo can do so much right?:
- 1 cup distilled water
- 1 tbsp castile soap
- 10 drops tea tree or lemon essential oil
I start by giving the entire oven a good spray down and let it sit for a good 5-10 minutes. Then, I give it another light mist and sprinkle baking soda on both the bottom of the oven and door {I went a little overboard with the baking soda in the photo below}.

I wipe down the walls first, then go to the door and interior of the oven scrubbing in a circular motion. Because the bottom and door get the dirtiest, the baking soda seems to add a little scouring power.

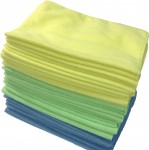
I rinse the sponge and repeat until the baking soda is gone. Then, I use the half distilled water/half vinegar spray to spray everything down one last time and wipe up with a clean, dry microfiber cloth. The vinegar helps get rid of the white film that is caused by the baking soda scrub and leaves the interior shining.
This entire process takes about 15 minutes, give or take. I could have totally stopped there, my oven was looking good!
But then the spring cleaning mode kicked in. And I realized there was a part of the oven that hadn't been touched in a very long time. I was beyond scared to even know how bad it was.... are you ready? Have you ever lifted your stove-top to reveal the area below your burners?
Oh. My. Gosh.

We must really favor the left side of our stove.... moving on.
I decided to use the same method on the top that I used on the interior.
Vacuum.....

Spray....

Soak, baking soda sprinkle and scrub!

A little literal elbow grease and I couldn't believe how quickly it was all coming up.

And the fabulous end result of the added love....

Oh! But I was not going to stop there! This was starting to feel really good! What more could I clean? A little puppy dog pouty lip face to my hubby and I was able to convince him to take apart the oven door. This is something we had never done before, but something I always wanted to try because I couldn't stand that for years I would clean the inside and outside of the oven door, and was always left with these weird drips showing through.

Oh! That would be why! They were in-between the stove glass! Seriously, amazed how they even get there.

My hubby recommends being really cautious during this process. Our guess is that all ovens are different, but ours required us to remove seven screws in total to separate the glass from the door enough for a good cleaning. Same steps were followed to clean every last crack and crevasse and then it was re-assembled.
While the drawer was out, I wiped that out and vacuumed/mopped under the oven as well. What was initially going to be a quick 15 minute task, ended up turning into a good two hours of oven cleaning.

But I am SO glad I took the time to just do it all, and do it all right. Don't you just love that fire that the onset of spring puts inside of us to deep clean?
Oh! And for those wondering about the oven racks. Every few months when we clean the interior of the oven, we soak the racks in hot water in the tub with a little dishwasher powder or laundry detergent sprinkled in. The next morning, I use an abrasive sponge to wipe off the grates. Very little scrubbing is required due to the good soaking.

So, for those following along, if you are anything like me and don't give your stove frequent cleaning attention, you may want to give yourself a few extra minutes, or even hours. It will be worth it, I promise!

Looking for something? Check out my favorite cleaning products below:


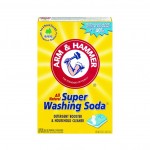

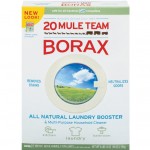


These are all cleaners/products that work for us and our current home finishes. It is important to research the cleaners prior to using them on your specific counter and flooring selections.


No comments:
Post a Comment